|
Gallery Ducati
|
|
|
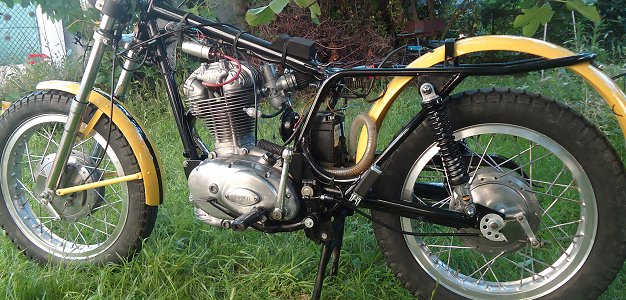
RESTORATION OF MY 350 DUCATI SCRAMBLER Why this motorbike? Because it is the one I prefer, perfect synthesis between the Italian style of the seventies and the American bad boys' motorbikes of the fifties. Anyway, this motorbike was initially designed for the American market. Here it is as I bought it from a geek in Barcelona, on the way back somewhere in Catalunya... 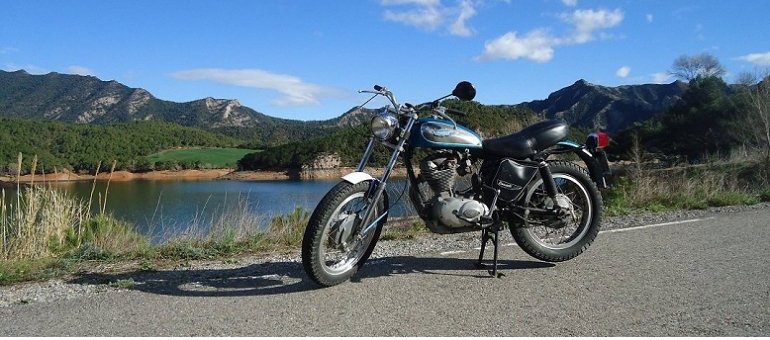
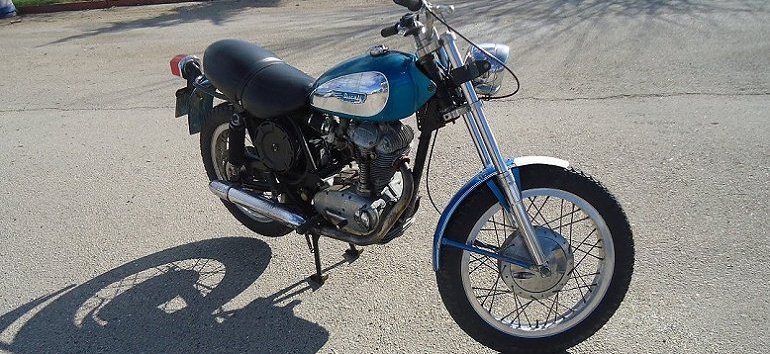
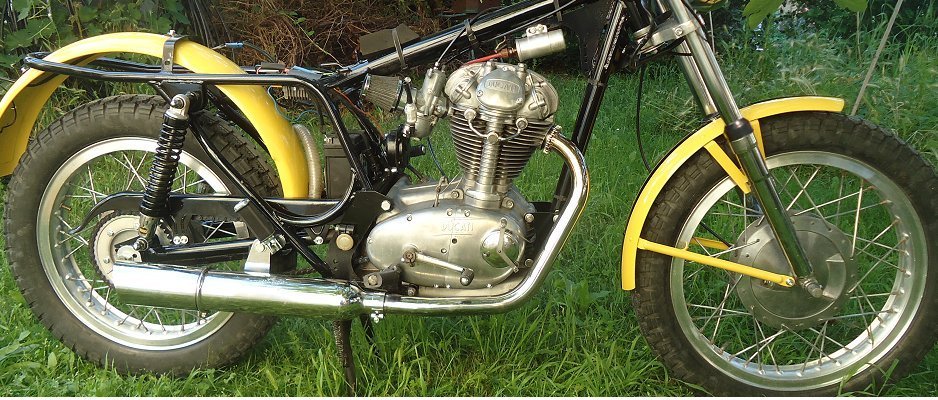
THE BODY After a first cleaning, the engine and the wheels have a little bit more shining aspect. Except for the exhaust silencer, which probably might be removed. 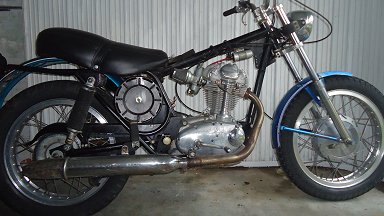

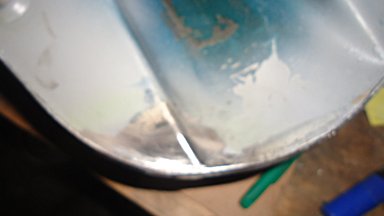
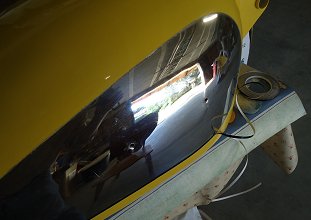
Concerning the tank, three leaks on its back require brazing and welding before to dream about painting it: 
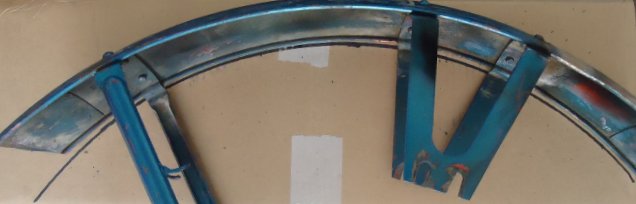
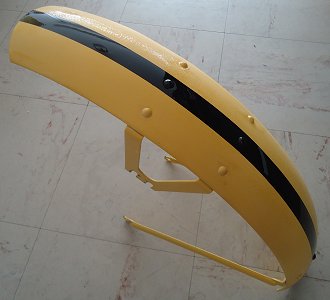
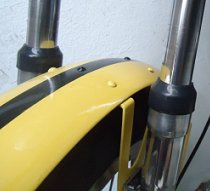
Fortunatly, the chrome sides are safe, that it's not the case of the mudguards, all dented or bent. A long job is expected on the body, hence the necessity of elaborating the so vital tool for straightening them up: a pattern which has the same curved line, wooden made, conceived in taking a foot print on a preserved part of the front mudguard thanks to blue color ink: 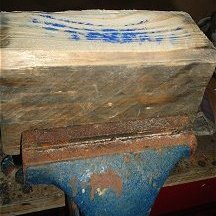
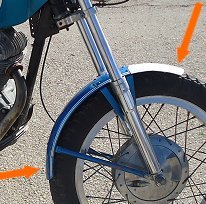
As much important is the reference curve for the front mudguard, drawn full scale from its not skewed central part, in order to straighten its two extrmities which are clearly bent toward the wheel under repetitive impacts (see arrows on the following picture). The mudguard is heat up then straighten until it is perfectly parallel to this curve end to end: 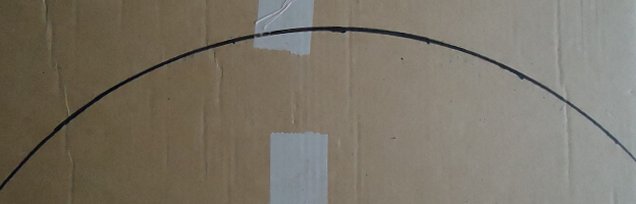
Here it is into its torture instrument after heating, stuck against the wooden pattern in order to avoid it looses its shape, and following picture, the evidence he got back its genuine curve: 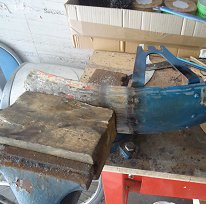
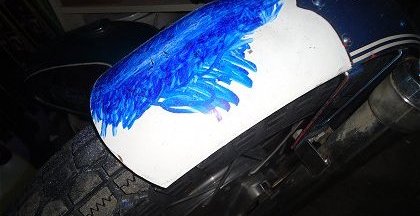
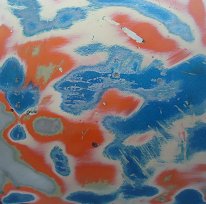
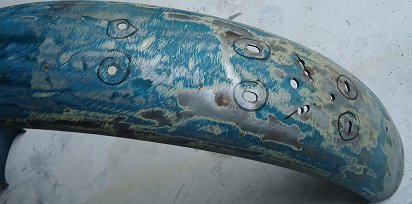
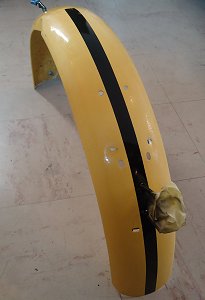
Then, it is scraping and sandpapering and suddenly, the motorbike's life story reveals itself: the front mudguard was orange, and is not the genuine one. It was repainted in blue and double adhesive strips were stuck on... On the picture, we can find out the size of the genuine Scrambler black strips (4 mm wide at 11mm from the rim). Sometimes among the successive color layers, beautiful abstract paintings are drawn aimlessly... 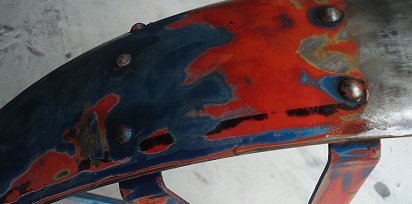
Here below the rear mudguard, that received the same treatment, due to its final part which is both bent toward the wheel and flattened (see the arrow) with in in addition, supplementary holes to be plugged, the ones that were committed for mounting the awful japonese rear light! Sacrilegious. 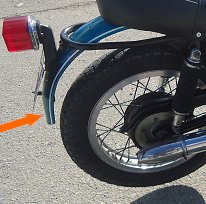
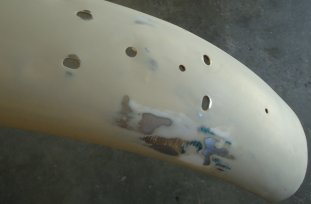
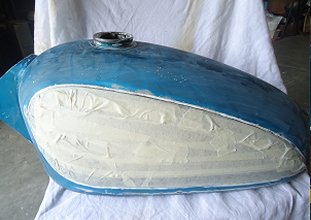
After filling up the useless holes by brazing, it is the starting point of an infernal process: primer coat, sandpapering, puttying, sandpapering, primer coat, until the rear mudguard is ready to be painted: 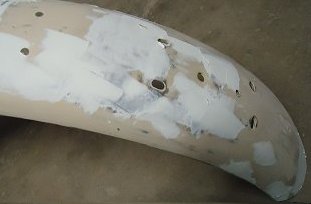
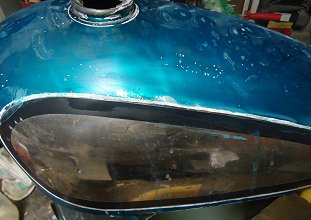
Here is the tank, with a protection adhesive tape positioned 1mm on this side of the painted strip in order to sandpaper it for erasing its thickness before positioning the new strip. Then, the chrome sides are hidden. The sanspapering job can start: 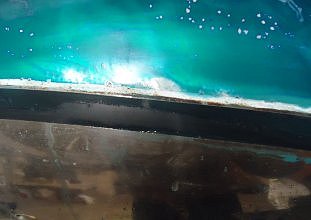
At last, it is the fatefull moment of epoxy painting, with the gorgeous genuine ochre, obviously more compliant with the Scrambler spirit thant the Mototrans metallized blue. Now, it is time to position the new strips, black colored this time (before epoxy varnishing layer): 
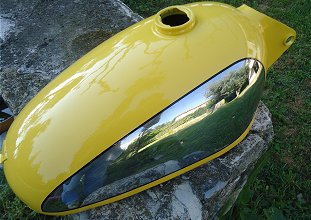
Not forgetting the tank logo of which the blue paint has to be cleaned off and replaced by the black genuine color: 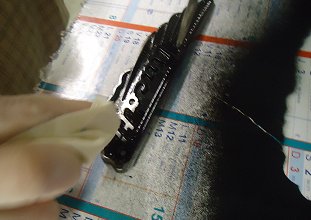

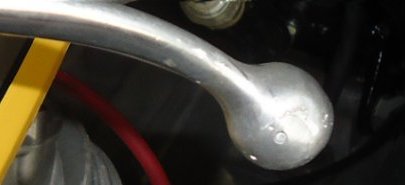
I saw that the clutch handle was damaged too, half eaten up probably in consequences of a beautiful previous owner cropper. Electric welding in order to olverlay aluminium and that's all there is to it: 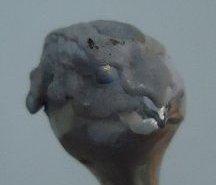
But what is going on? We are in April and Santa Claus just came? 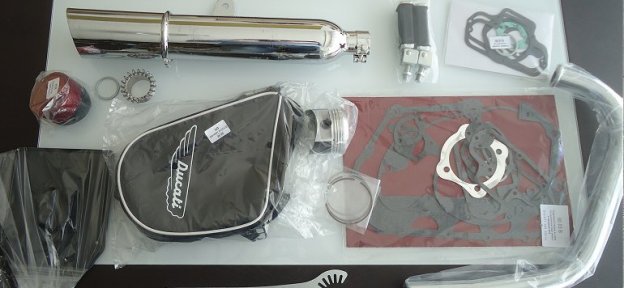
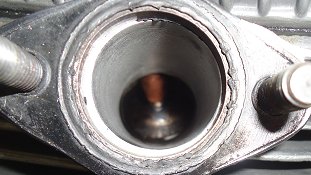
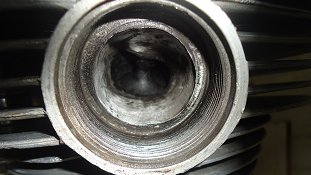
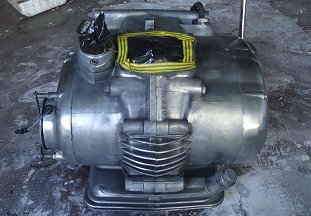
THE ENGINE To acquire a Scrambler without any guarantee concerning the millage on the clock (anyway, there is no clock at all), it is like dices and beting on ones own capacity of listening to the odd noises of the engine during the few minutes of the trial, then of analyzing them correctly... Fortunately, according to the Ducati mechanic, the piston is the only part to be worn out, the rest seems to be a priori safe... Here below the combustion chamber after 20 minutes cleaning, all the same (for sure, there were 1/2 mm minimum carbon deposit on the valves and on the chamber! How could the engine still run?) but which keeps its petrol capacity during dozen of minutes without any leak. A good clue... Here below too the intake and exhaust ducts once decoked: 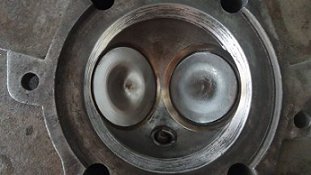
But it is atonishing to discover a bottleneck a the very deginning of the exhaust pipe of which the diameter is significantly lower than the toric joint and exhaust duct one (here below the seal positionned on the pipe to see the difference). Impeding exhaust gas flow on a 4 stroke, it would be monstrous! The bottleneck is countersunk straight: 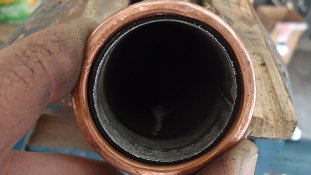


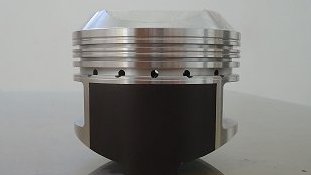
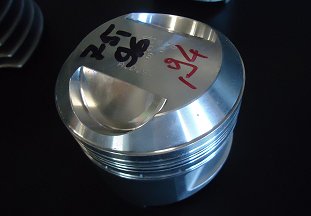
And on the following pictures, the brand new piston that is already hopping up and down with impatience to join the engine once its cylinder's line refreshed: 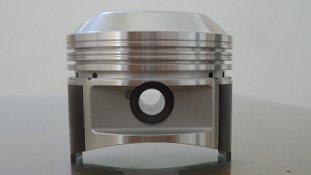
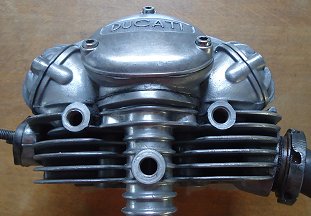
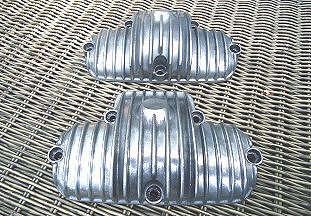
Here is the cylinder, after 5 hours hard job, a mixture of strippers, shampoos and all sort of washing powders added with steel filing, and shaked by the mean of a long and strong haired brush, then steel wool and a plastic shaft in order to rub between the fins. The result is as much as enjoyable: 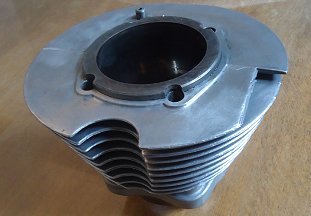
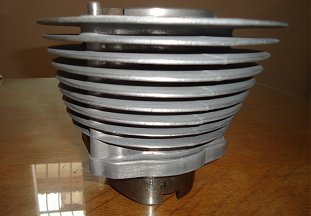
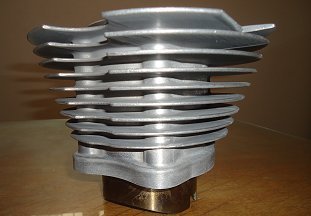
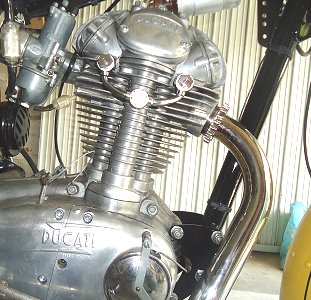
It remains to do the same with the cylinder head, and there, it is not a piece of cake given its tricky shapes... But after a full day polishing, its all sculptural grandness is back: 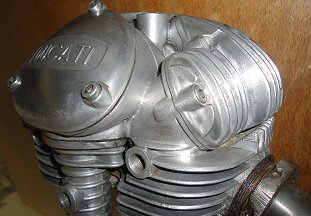

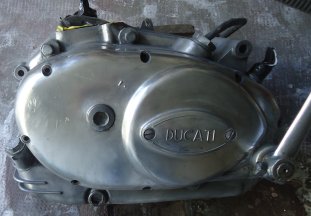
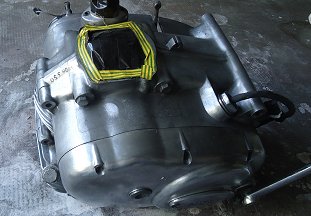
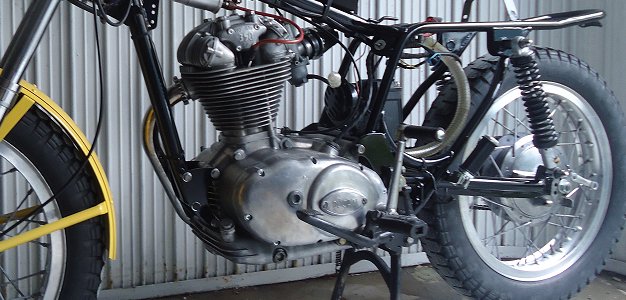
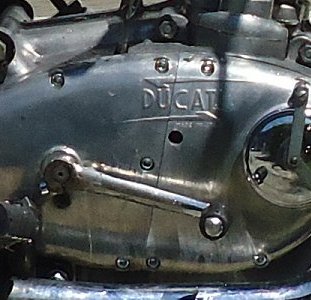
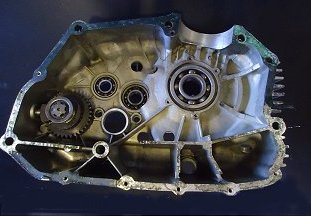
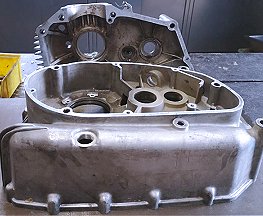
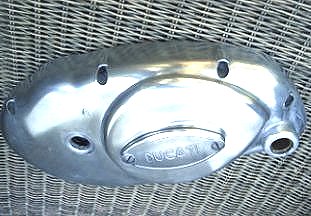
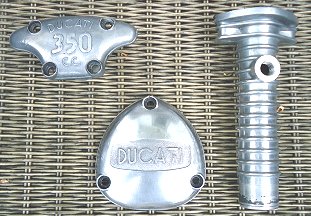
About the engine housings, taking the opportunity it was disassembled from the frame (for cleaning the centrifugal oil filter and removing the piston), it requires to polish and to scrub for hours... I worked like a nuts to get a satisfactory visual result. It will be gorgeous once remounted on the beast's black frame: 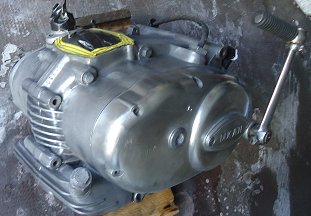
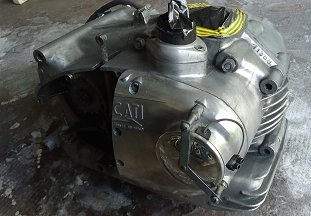
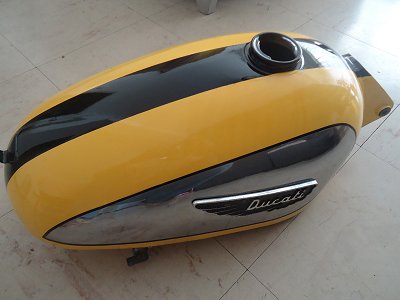
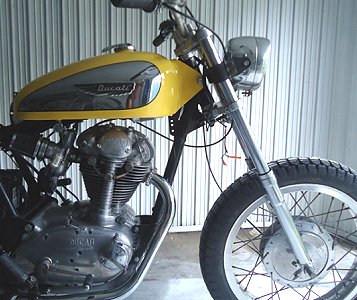
For that matter, here is a first overview with the new exhaust pipe and with the tank: 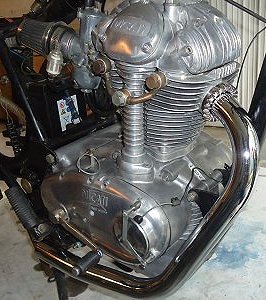
But it is on the timing side that snags turned out after 1200 km of holidays ride, this summer. The bevel gear threat on the crankshaft was damageed, and the gear felt on the way back despite the supposedly Ducati garage service. The bottom bevel gear and its nut are dead. The washer (that was lost too) must be canceled to gain additionnal safe thread, and the bevel gears and the crankshaft nut have to be replaced, with maybe 2 welding spots if required (a brand new and well set up bevel gear can last ages, welding spots are not so heterodox because they can be removed with a grindstone, in case of). 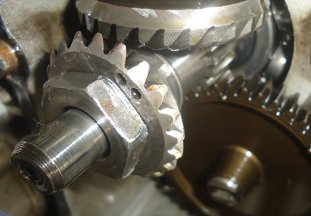
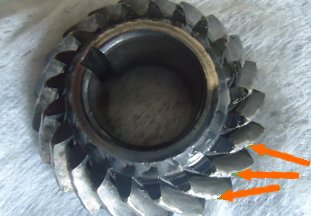
But the worst was about the top bevel gear, with 1mm play on the rotation, that causes the incredible engine noise. During the service, the Ducati mechanic removed the camshaft (which was dented on its thread too) without paying attention to the bevel gear setup. As a result, the camshaft was vibrating, its bearings are now dented, as the rocker (the one nearby the most dented bearing). Consequently, all that stuff requires a specific setting up with addition of shims, and removing the 2 bearings of the camshaft and the inlet rocker. Perfect for significantly decreasing the engine running noises : 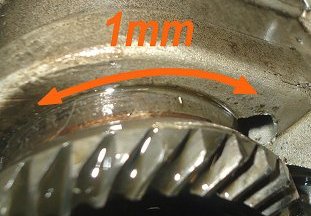
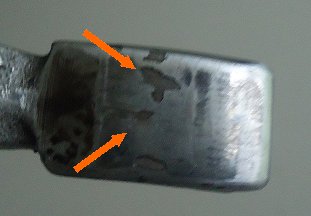
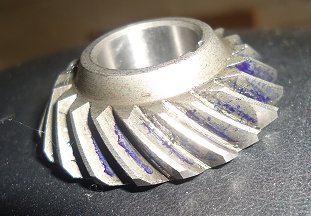
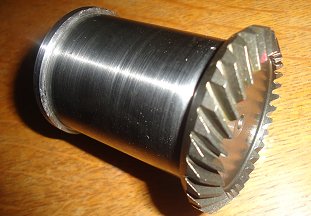
Here below the bottom bevel gear mounted with 2 brand new pinions and a new nut. Finally, the thread is still reliable, welding spots are not usefull. After many trials, thanks to ad hoc shims, the pinions are meshed up and rotate correctly (see the blue footprints length, thanks to the priceless specialists' pieces of advice from the "motoscrub" forum): 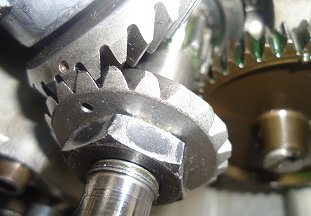
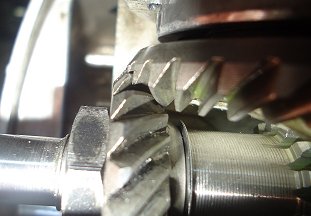
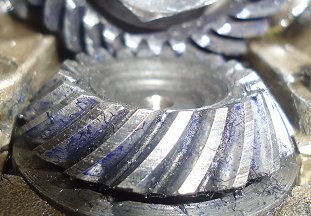
Here is the head cylinder positionned (with new camsahft bearings and inlet rocker) for meshing the top bevel gear. After ten trials, it finally needed 1,7mm shims on the vertical axle, and 0,7mm on the camshaft to make the 2 pinions perfectly meshing. It remains a minuscule play between them, just enough to rotate freely without clinging! As you can see on the blue footprints (despite the clothes remains), the teeth are working from the toe to the heel: 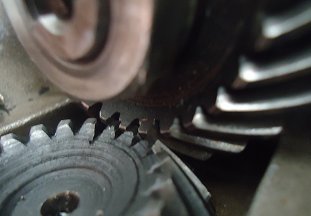
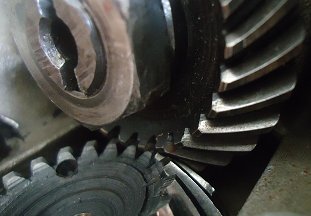
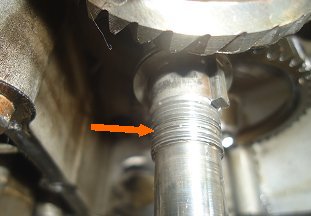
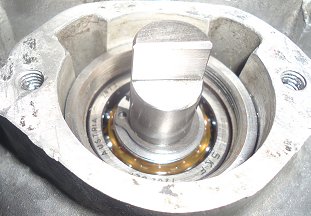
Here below the head cylinder definitively mounted with setup rockers (0,1mm play) and the bevel gears of which the points of reference are perfectly lined up. The following picture shows the housing with its brand new bevelshaft. Notice that the housing was machined in order to ease its remounting, given the initial assembly was too uselessly tight. As a result, bevel gear noises became quite normal! First assembly with a lack of play between bevel gears: video of running engine before setup and final assembly after adjustment: video of running engine after setup! On the last picture, you can see the housing joined inside the case with its new bevelshaft, upper bearings and circlip. The shims are set up in order to provide the circlip and therefore the bevelshaft with the minimum of vertical play. 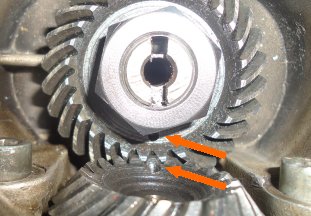
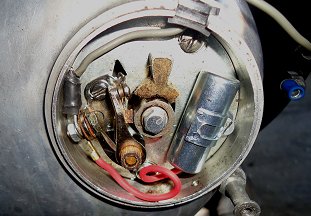
The bottom bevel gear is now lined on its points of reference relating the piston TDC. You can see the 20mm notch drilled in the left case that enabled to remove the bevelshaft without splitting the 2 engine cases. Surprising design error for a so well conceived engine, isn't it? At last, the distributor and the condenser are so tired, they are replaced by news ones: 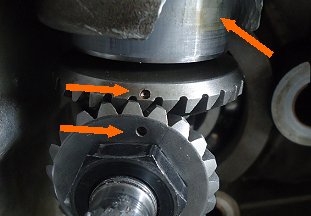
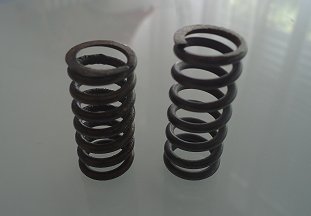
Exactly the same treatment for clutch plates and springs, removed by new ones. Clutch plates were not worn out but the springs were more than exhausted (on the right side, the new one, significantly longer) : 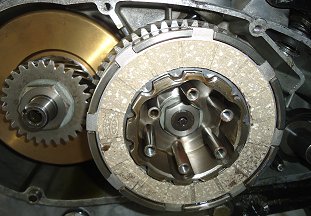
Back to begining of June, when Sant Claus came again... But doesn't the motorbike deserve that? 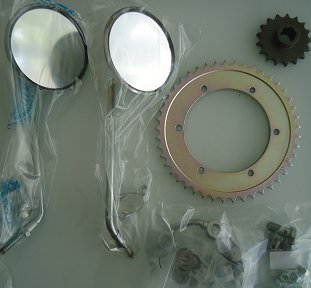
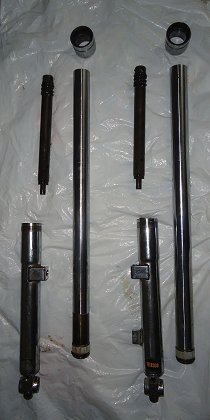
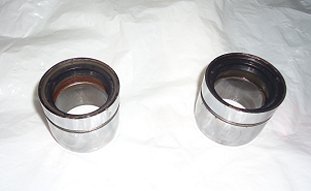
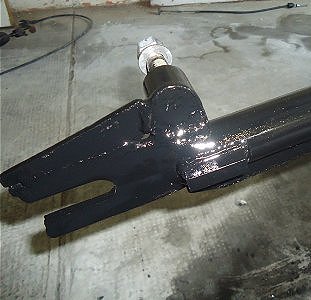
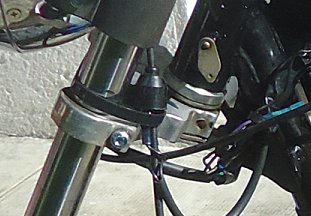
SUSPENSIONS FRAME, WHEELS AND FINAL REDUCTION RATIO Coming back riding this motorbike from Barcelona (310 km in passing by Andorre under the snow) was clearly crazy so much there was a play in the steering column. Maybe several balls were missing on the bottom of it? But no difficulty to find such parts. Two birds in one stone, I took the opportunity to order all the fork seals and to replace them. Here below the fork all apart, the collar remounted with the new seals and their circlip, then the dust covers: 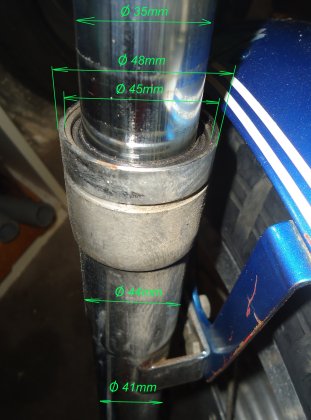
Wheels are eroded by rust but after several polishing and scraping hours, here below what it is possible to get from the rear wheel and its hub in the purest italien seventies style, despite the oxidised spoke's nuts that could be removed. It is not satisfactory yet, they have to be polished one by one in order they shine like the rotary brush passed (see the arrow here below): 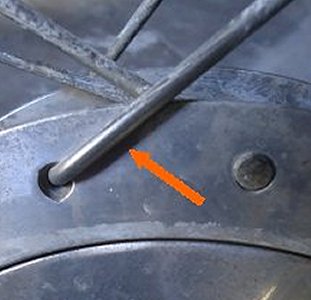
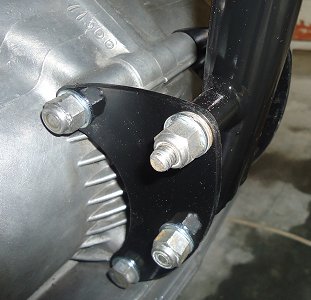
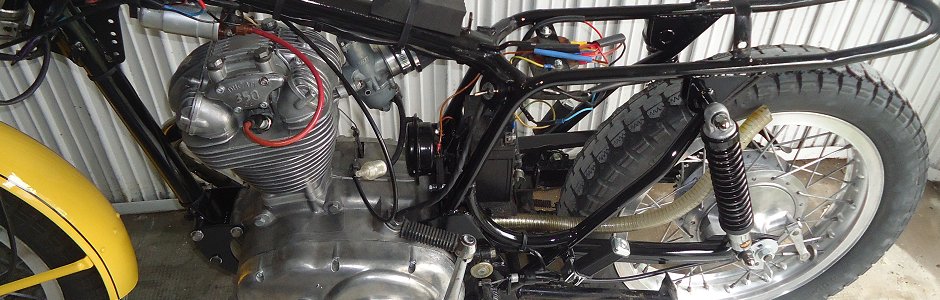
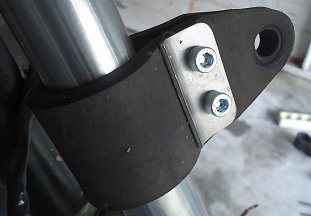
The frame is not very dented and doesn't need to be entirely dismounted. First of all, there are its rear part and the chain housing to be sand papered and repainted, before the front part, with the engine fastening plates, the fork T axis and all the backbone, while the engine bolts get a new lease of life thanks a invigorating acid bath when the coil sleeve clamp is repainted in metallized grey then inherits brand new bolts: 
Then it is the turn of the central part of the frame to be de-rusted, sandpapered then repainted: 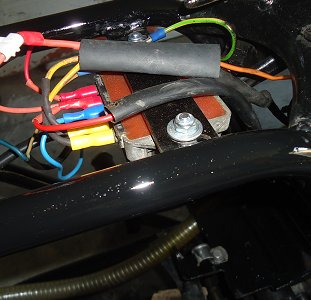
Concerning the air filter housing, quite ungraceful, it is advantageoously replaced by a scond tool bag identically to the left side: 
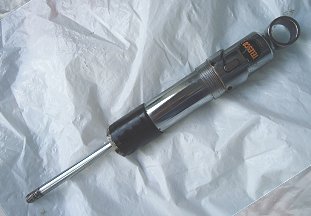
At last, the shock absorbers of which the rubber dust guards are teared up and the springs rusted, are cleaned up with acid, sandpapered and repainted in black color. Why hiding such beautiful srpings? Rubber dust guards away: 
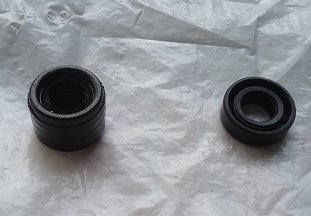
But one of the shock absorbers is leaking and anyway, they must be renovated. The rubber silent-blocs and seals are dented. Here below the old genuine Telesco seal and a new one which is built from a shorter Mazorcchi one, then the shock absorber remounted with the new seal and oil (same treatment for the second shock absorber): 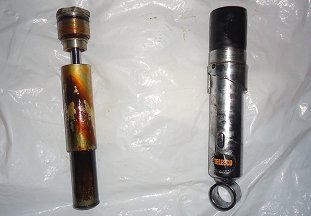
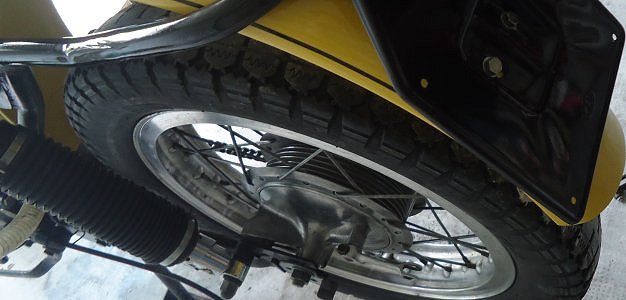
Back to the rear wheel with renovated spokes, on after the other (one mind-numbing day work) that get, with repainted frame, that makes an impression: 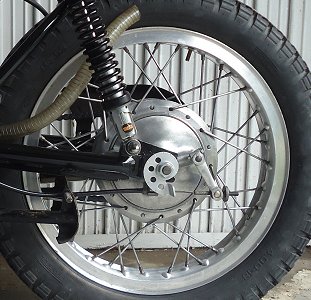
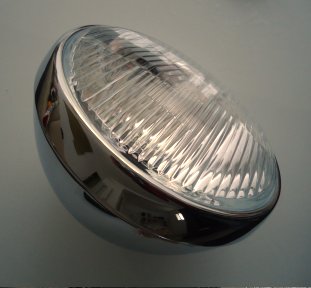
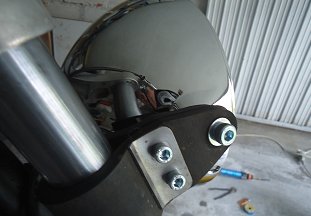
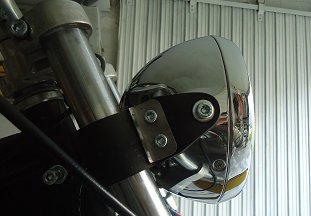
The front wheel is scraped and polished too, while the engine housing screws are replaced by brand new ones, as for the handlebar, the tank and the headlight support too, the rubber of which is also renovated and the metal plates are cleaned up with acid, not forgetting the head cylinder oil duct which is removed by a brand new one: 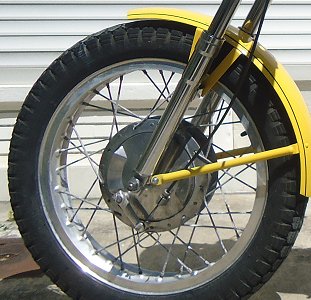

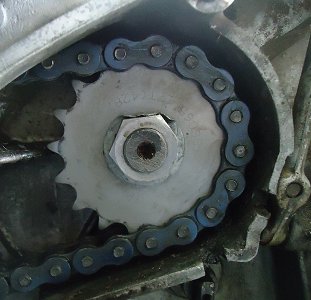
Concerning the final ratio reduction, with the rear 47 teeth crown and an only 15 teeth sprocket on the gear box side, the Scrambler reaches barely 96,9 km/h at 5000 rpm in 5th speed, that is quite an enduro reduction ratio. The crown is removed by a 45 teeth one, a brand new, what's more on the aesthetic side. And a 17 teeth sprocket replaces the 15 teeth one, a brand new one too (but for the aesthetic, there is no gain given it is not visible). In fact, given the engine torque, the final reduction ratio is perfect (45x17=114,7 km/h at 5000 rpm), and doesn't require mounting the 47 teeth crown back (even renovated) to get a more multipurpose final reduction ratio (47x17=109,8 km/h at 5000 rpm): 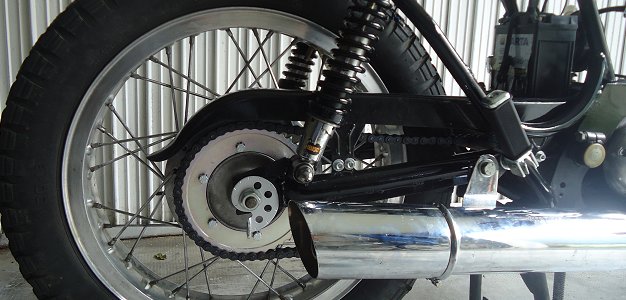
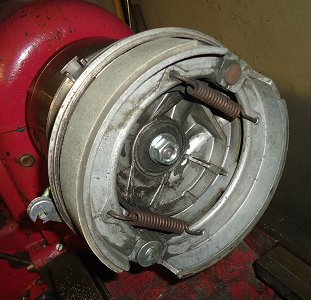
But at such a speed, brakes must be efficient. Unfortunately, the front brake is totally void. Nothing better than machining its lining on a lathe, in opened position thanks to a hook with a screw (see on the arrow), on exactly the same diameter as the drum. 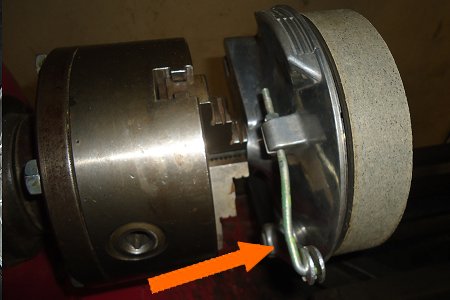
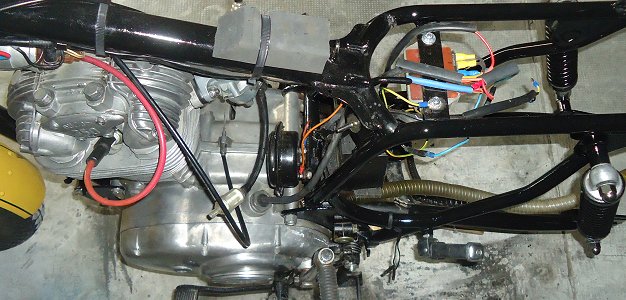
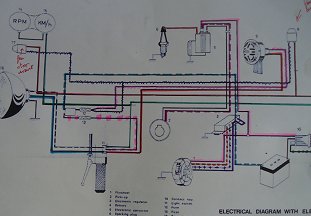
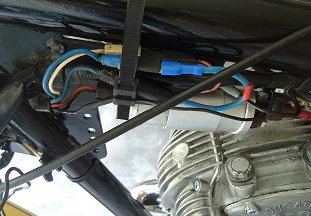
THE WIRING LOOM The wiring loom is like a headache. First of all, I believed that it will be easy given the available wiring diagrams. But these diagram are not only at variance, but none matches my motorbike... 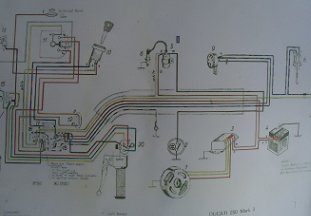
The rear brake light control that was always switched on was dismounted and saved thanks to my neighbour (the same as for my 250) but the front brake control is dead-still. As for the connexions, it is a mess, and even sometimes, it is squarely roten: 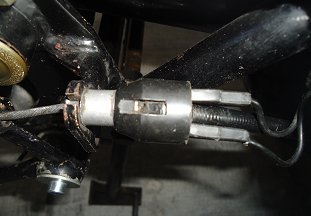
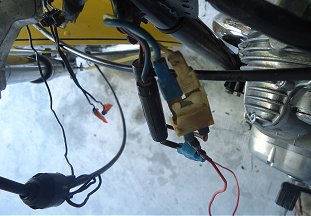
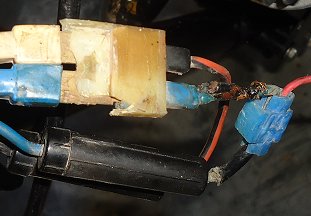
Maybe, will-it be sufficient in a first step to rebuilt all these connexions, and to check if power is there thanks to the ohmmeter, just to make the front and rear lights back? But colors written on the converter box don't systematically match the wire ones. It is probably the reason why the horn get a little bit noisy as soon as the brake pedal is pushed? And where to plug these 2 wires? Does somebody recognize them? 
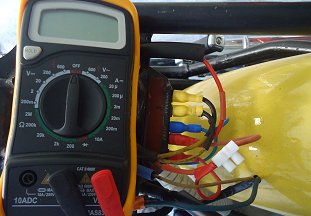
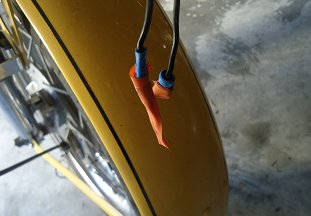
But little by little, the wiring loom is recovering, short circuit sources are getting more and more scarse, some lonely wires have suddenly found a soul mate, the horn wires are inverted, the front brake control is risen from the dead, and by some miracle, fiat lux... 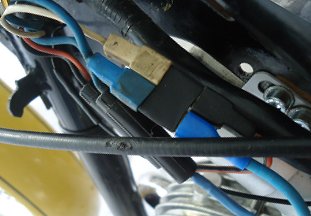
COMPLETE CRANKSHAFT REFURBISHMENT Unfortunately, some 2000 km later, the crankshaft collapsed. After dismounting at a specialist garage, it turned out that the centrifuge filter, supposedly cleaned by the local Ducati dealer, had not been! As a result, like the distribution which was not correctly remounted and had to be reworked, the crankshaft, the rod, all the bearings and the liner as well, had to be removed: 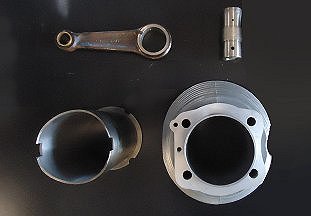
Simultaneously, seals and a lot of screws have been replaced: 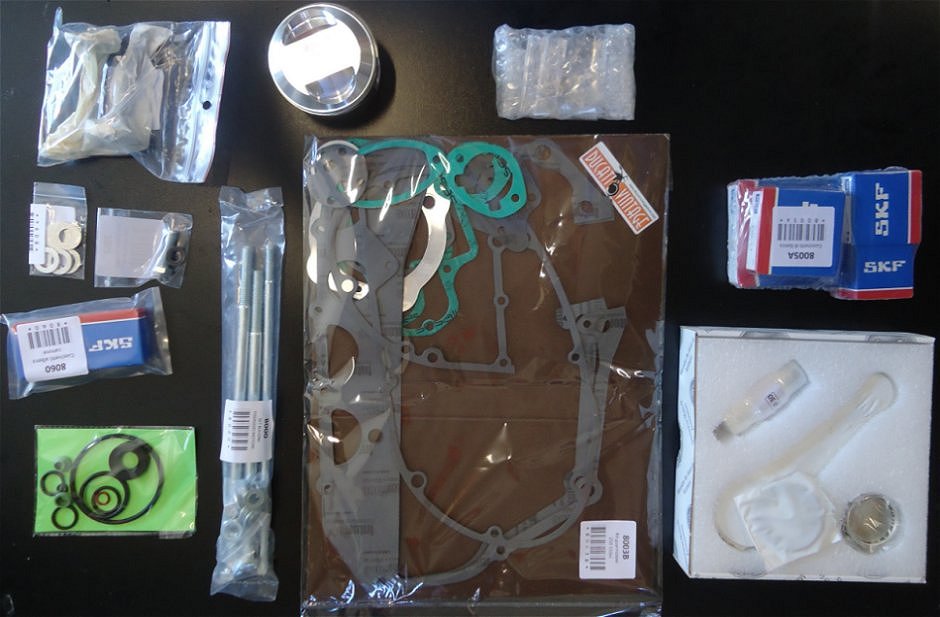
Not to mention the opportunity of refreshing the seals plans: 
And polishing a little bit more the different housings: 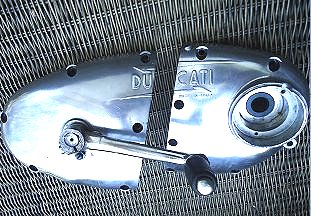
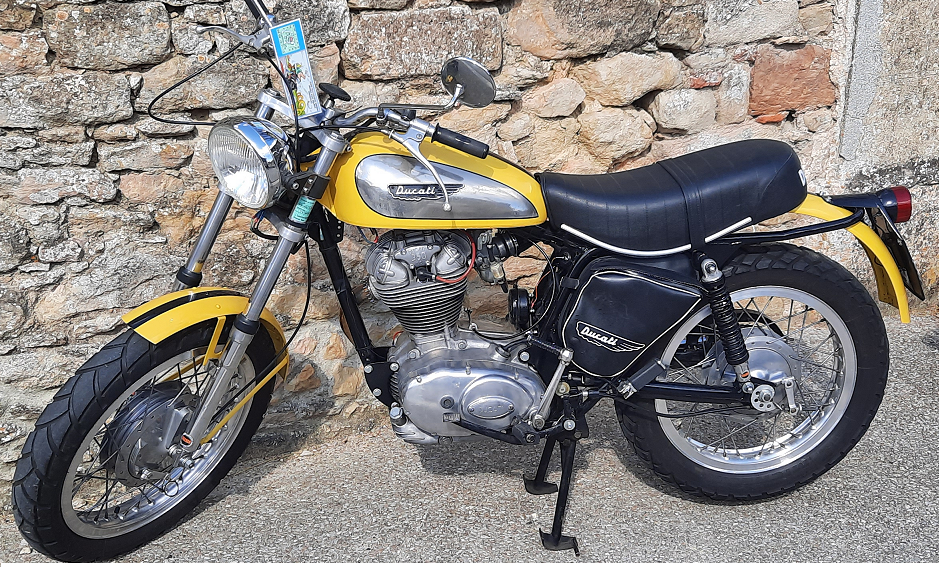
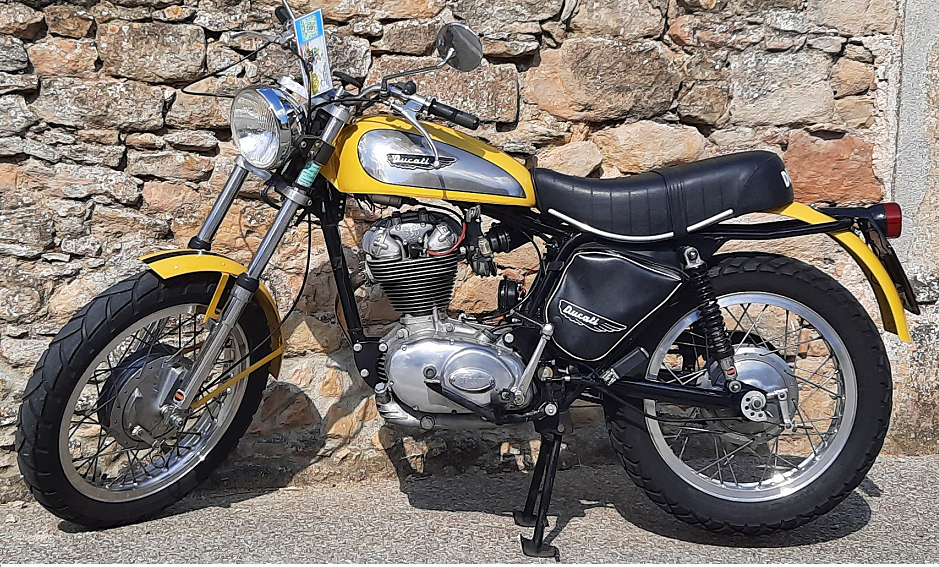
AND THE FINAL RESULT The time has come to remount everything, with a kind of feeling of course, because it is at this magical stint that all the parts which have been meticulously renovated one by one turn out together within the final assembly. But skipping is not allowed, rather taking advantage of the intermediate steps in order to savour one last time the freshness of half assembled elements that constitute this Scrambler 350 : 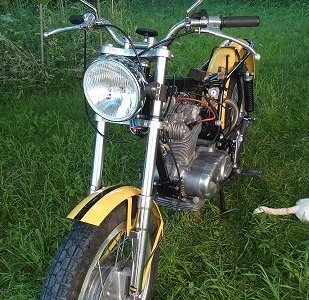
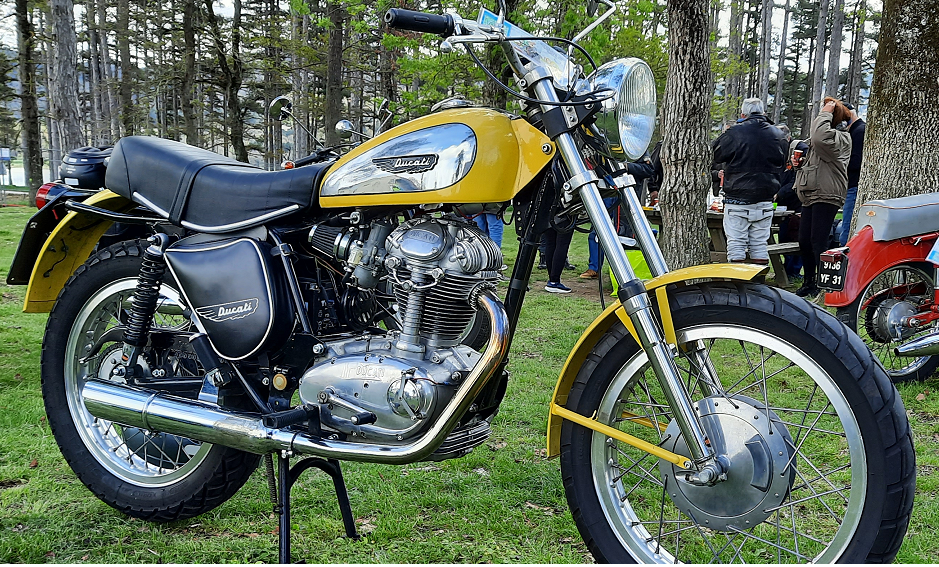
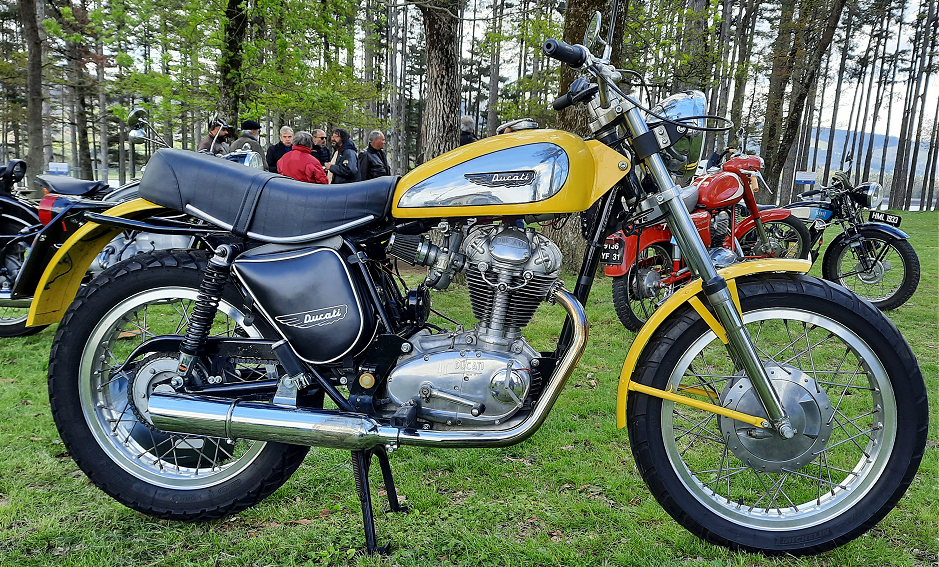
On the following pictures, from an oldtimer club outings in April 2022 (the first picture) and in April 2023, the brand new engine is barely run in (1200 km for the crankshaft, 3000 km for the distribution): 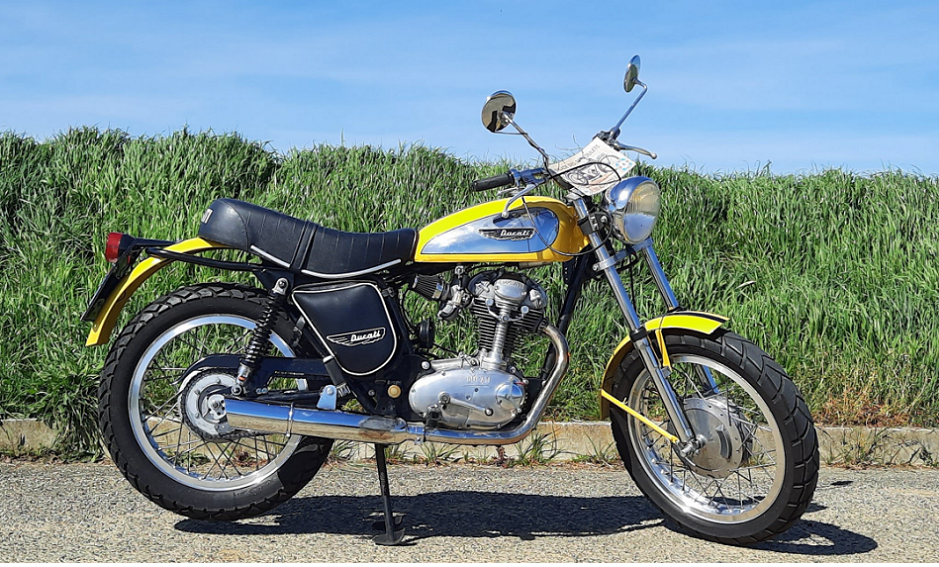
|
|
| 250 ETZ mods 250 G-Purp STR 350 ItalScrambler Triumph Bonneville PUCH SGS MZ 125 TS BMW R26 custom Scooter STR |